Discover the how to clean kitchen cabinets with our ultimate cleaning guide! We’ll walk you through the best products, tools, and techniques to effortlessly clean any surface or material.
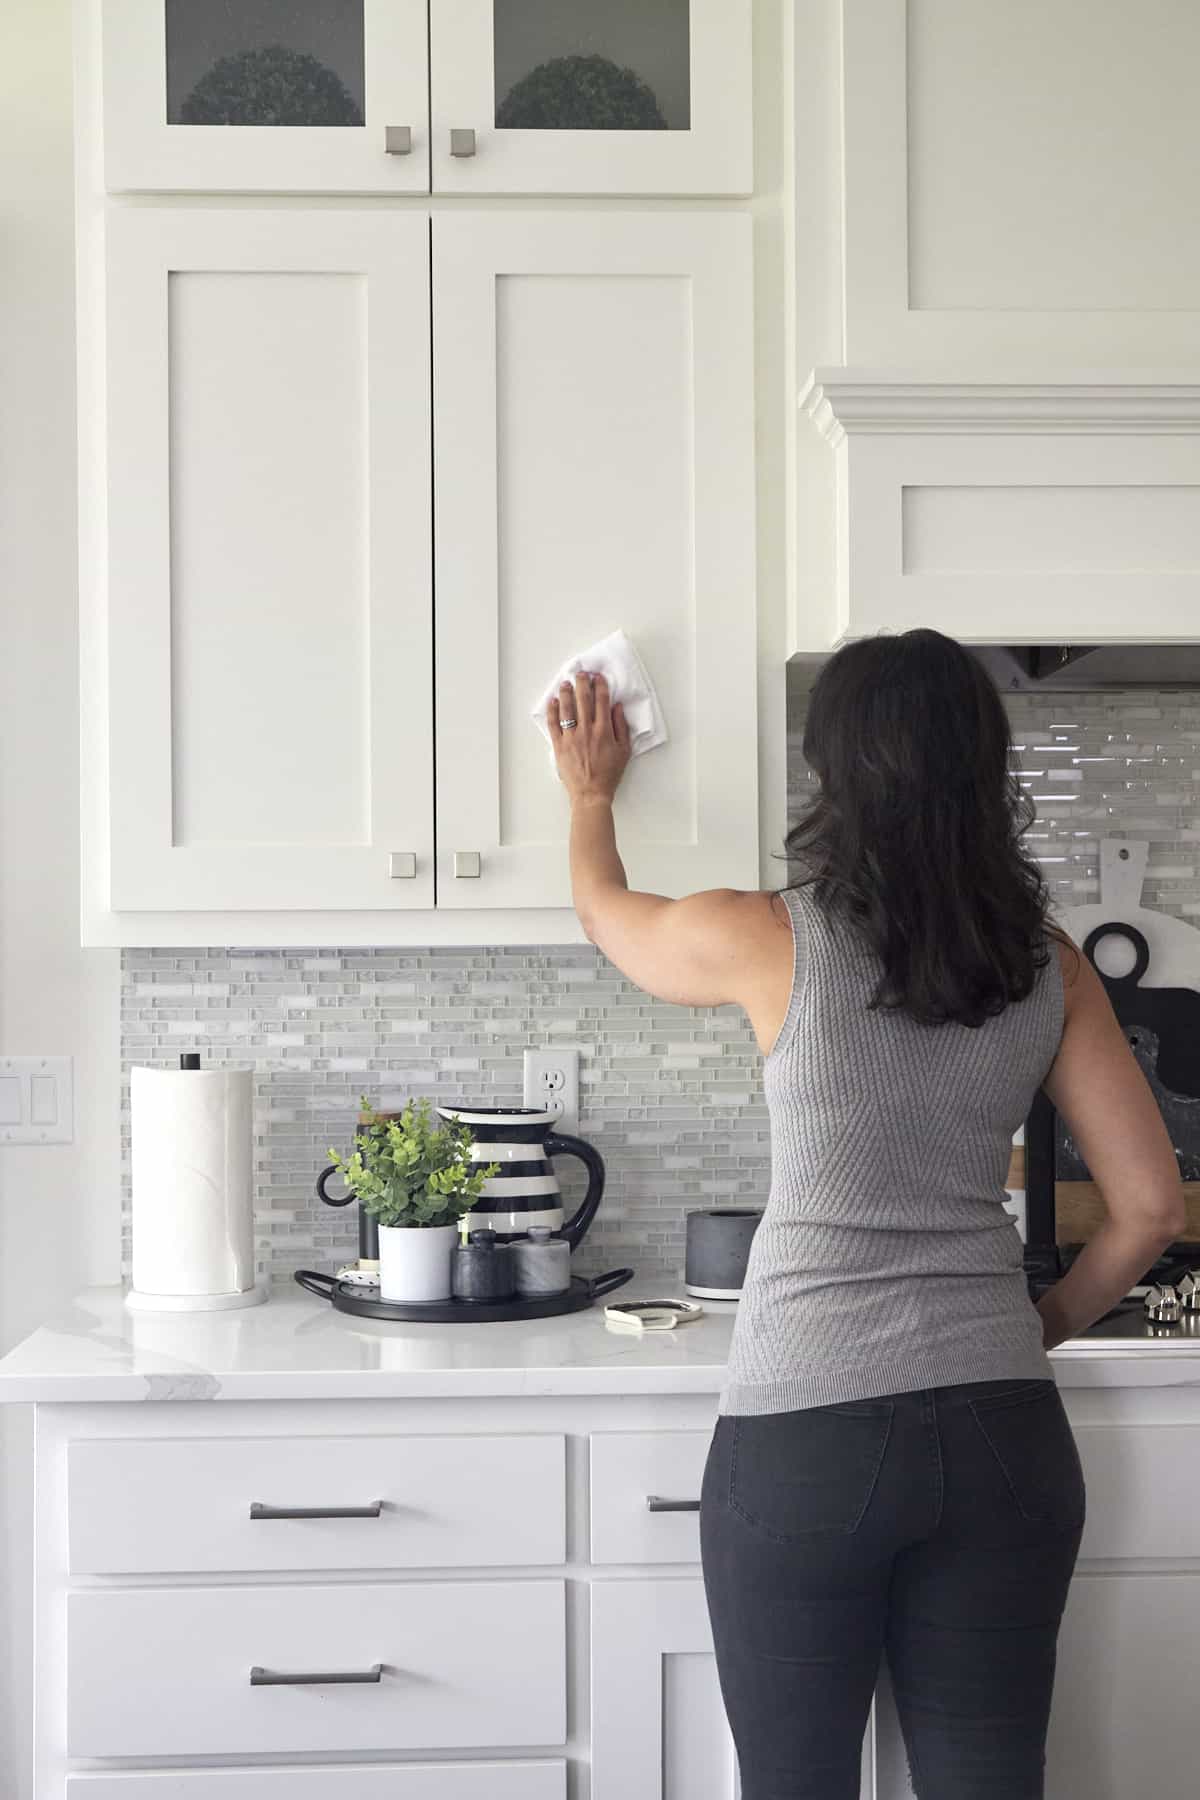
Table of Contents
- How to Clean Kitchen Cabinets
- Step 1: Know the Cleaning Specifications of Your Cabinet
- Step 2: Empty Out the Cabinets
- Step 3: Vacuum the Debris
- Step 4: Get (or Make) Your Cleaning Agent and Tools
- Step 5: Clean the Tops of the Cabinet
- Step 6: Clean the Inside of the Cabinets from Top to Bottom
- Step 7: Go Hard at the Greases and Stains
- Step 8: Tackle the Trims
- Step 9: Don’t Forget the Hinges and Hardware
- Step 10: Polish the Glass or Clean the Outside
- Step 11: Clean the Contents
- Step 12: Place the Contents Back into the Cabinet
- The Bottom Line
- Common Questions about Cleaning Kitchen Cabinets
- More Lifestyle Hacks
How to Clean Kitchen Cabinets
Kitchen cabinets can get dirty very easily. Though often overlooked when cleaning up the kitchen, your cabinets play a crucial part in making your kitchen shine.
So, if your cabinets are looking a little dusty or greasy, we’ll help you bring them back to life with this Ultimate Guide on How to Clean Kitchen Cabinets!
Step 1: Know the Cleaning Specifications of Your Cabinet
It’s important to know what material your cabinets are made of in order to clean them properly because different finishes will have different requirements. For instance, some methods may work for specific cabinets, but not others. Don’t worry! We’ll break down the differences below.
Different Cabinet Finishes
Wood Cabinets
Wooden cabinets may be solid wood, vinyl-coated, or veneer over wood. There are different types of seals and coating on top of the wood that will need to be cleaned in a particular way.
General-purpose oil-soap wood cleaners are good for all types of wood cabinets. When cleaning, be careful not to get your cabinets too wet as they can become damaged from too much moisture. So, only apply a little bit of cleaner at a time, and immediately wipe it dry.
Painted Cabinets
Painted cabinets are more durable because they have multiple coats of oil-based paints.
The best cleaner is warm water and a diluted cleaner, but you can also use wood cleaner or white vinegar.
If your cabinets are really dirty, you can scrub them a bit, as they have a sturdy sealant that won’t be damaged with a bit of elbow grease.
Just remember not to get them too wet, as they can still become damaged from too much moisture! Use a soft cloth to wipe your cabinets avoiding abrasive scrubbing tools.
Once you’re done, wipe with a damp clean cloth.
Laminate Cabinets
Laminate cabinets are similar to painted cabinets in their finishings. You can clean these with water and a diluted cleaner. Rinse and wipe down afterward.
Interior Cabinets
A diluted cleaner or mixture of vinegar and water can be used to clean the inside of your cabinets.
Keep a soft cloth handy to wipe up any spills or stains. A toothbrush can be especially useful to clean along the sides and edges.
N-Hance Cabinet Refacing Process
Unfortunately, some damage to cabinets may not be salvageable. In this case, you may need cabinet refacing, also known as cabinet door replacement.
If there are significant scratches, gouges or nicks in the wood, or the finish has worn down to the wood, these are all signs that you’ll need cabinet refacing.
This process is significantly cheaper than a complete replacement and can make a huge difference to the overall look of your cabinets.
Step 2: Empty Out the Cabinets
Once you know how to clean kitchen cabinets based on the type you have, it’s time to get to work.
To get started, remove everything from your cabinets. If you like the layout you have now, it may be helpful to take photos of where everything is. Or, lay everything out so that you know where it belongs.
Use this as an opportunity to check the dates on all of your food products.
Throw out anything past its use-by date and wash any dirty crockery or containers. Anything you aren’t going to use or eat, throw out or donate to a food bank!
Step 3: Vacuum the Debris
As you go through the process of learning how to clean kitchen cabinets, there will very likely be crumbs, dust, and other food spills in your cabinet. Vacuum these up first to make it easier for you to clean.
Step 4: Get (or Make) Your Cleaning Agent and Tools
All of the following cleaners are great for different purposes. You can choose which will be easiest for you and your cleaning needs when it comes to how to clean your kitchen cabinets.
With all of the items below, avoid spraying or applying the solution directly onto the cabinet. This can potentially leave streaks and may cause discoloration. Instead, apply the product onto your tool of choice, and then clean the surface.
If you have to apply a solution directly to the surface, try not to use too much, and be sure to wipe it up carefully and thoroughly afterward.
Chemical Cleaners
Degreasers
For especially dirty and greasy cabinets, a degreaser is the best option for cutting through tough grime.
This may be a good option to use in cabinets where you store appliances like grills, or on shelves where oil is kept.
Although degreasers are great at removing grease, they may not be the most effective in cleaning stains. You should use this in conjunction with a cleaner that works on general stains and dirt.
Commercial Special Cabinet Cleaners
Specially made cleaners for cabinets work great on all types of messes.
Buying a dedicated cleaner is also a great option if you don’t have the means to make your own. Often these types of cleaners are multi-purpose, which means you get more bang for your buck.
Green/Homemade Cleaners
Vinegar + Water
Mixing vinegar and water is an easy and cheap cleaning solution. Mix one part vinegar and two parts warm water to make an all-purpose antibacterial cleaner, capable of cutting through dirt.
Vinegar + Hydrogen Peroxide
While this isn’t a cleaning solution, these two are powerful disinfecting agents. When combined, they create peracetic acid, which is used as a disinfectant in the food and medical industries.
However, be careful not to mix these together yourself! Combining them creates a corrosive acid that can damage surfaces. Instead, use them in succession.
Lightly spray vinegar onto a surface and leave it to sit for five minutes. Then, lightly spritz the surface with hydrogen peroxide. Leave it to sit for another five minutes, and carefully wipe it away with a cloth.
Spraying these ingredients separately is safe. The chemical reaction is different when mixing them in a closed container or in open air.
You’ll get the best results if you lightly clean your surface with a cleaning solution before using vinegar and hydrogen peroxide on it.
Baking Soda + Water
Mixing baking soda and water is a great cleaning agent as it not only dissolves grease and dirt with ease, but it’s also an inexpensive and easy DIY cleaning solution. In addition to being odorless, it can cleverly mask any smells that food may have left behind.
Baking Soda + Castille/Dish Soap
These two are a brilliant mix to get rid of grease, leaving behind a shiny and clean surface that smells good, too! This method is best used for an especially dirty surface.
Mix half a cup of baking soda with enough detergent to make a paste. Let it rest on the surface for 10 minutes before gently scrubbing.
The Best Tools for Cleaning Kitchen Cabinets
Cleaning Gloves
If you’re dealing with grimy and greasy surfaces, wearing gloves is vital! Especially when using solutions that include vinegar, make sure you wear gloves so that your hands don’t smell afterward.
Some store-bought cleaning solutions may also strongly advise that you wear gloves, as they may contain ingredients that are harmful to the skin.
Sponges
Sponges are great for scrubbing in a non-abrasive way. They absorb cleaning solutions well and are able to evenly disperse them across dirty surfaces.
Scrapers and Scrubbers
For very stubborn dirt, using a scraping tool may be the best option for removing grime from your surface. Old cards work great here, as they won’t scratch your surface.
Microfiber Towels
Microfiber towels are powerhouses in the cleaning world. Their reusable nature and ability to absorb liquid make them great for wiping up anything.
Old Toothbrush
Old toothbrushes are another good tool for gently scrubbing crevices or tight spots in your cabinet.
Step 5: Clean the Tops of the Cabinet
Even though you don’t see the tops of your cabinets very often, this doesn’t mean you don’t have to clean them! This can be one of the dirtiest places in your kitchen and they’re crucial to tackle for those learning how to clean kitchen cabinets properly.
Scrub or Scrape
Residue may have collected on top of your cabinets. You can use a sponge or an old card to scrape this off and loosen any dirt. Then, just wipe away the debris.
Clean
Next, use a general all-purpose cleaner on the surfaces. Be careful not to spray too much!
Wipe
Finally, wipe the surfaces clean with a dry cloth.
Step 6: Clean the Inside of the Cabinets from Top to Bottom
Using the method that works best for the state of your cabinets (and what has been in them), clean the inside of your cabinet with your chosen solution and tool listed above.
Pro-Tip: If you have a Lazy Susan, pay attention to the corners and dividers of the shelves. Use a sponge or a cloth to wipe down shelves with your cleaning solution.
Step 7: Go Hard at the Greases and Stains
Fingerprints
Vinegar is great at getting fingerprints off kitchen cabinets. Use a cloth soaked in a 50/50 water and vinegar solution to wipe the prints away. Then, buff clean with a polishing cloth.
Grease
Either a degreaser or a baking soda mix is great for removing grease! Apply the solution, and let it sit for three minutes. Then, use a non-abrasive sponge to gently scrub away the grease.
Food Splatters
Baking soda and water applied with a toothbrush clean up food stains well. Gently scrub the stain. Then, simply wipe it away.
Water Stains
For water stains, a vinegar and water solution is a great option. Apply with a non-abrasive sponge, and gently wipe the cabinets down.
Scuffs
Diluted soap is great for scuffs. Gently scrub at the mark using a cloth. Then, wipe it with a second clean, dry cloth.
Step 8: Tackle the Trims
Gently scrub any trim with an old toothbrush with your chosen cleaning solution. With its fine bristles, a toothbrush is great for reaching the intricate details of your trim.
Step 9: Don’t Forget the Hinges and Hardware
First, scrub any hinges with a brush. Then, use a vinegar and water solution to clean them.
Rinse with clean water, and dry them with a clean cloth. To finish, polish the hinges and hardware with a soft cloth to make them shine!
Step 10: Polish the Glass or Clean the Outside
Now that you’ve learned how to clean kitchen cabinets from the inside out, give the outside of your cabinets a general wipe-down with a cloth and gentle cleaner. If your cabinets have a glass insert, use glass cleaner and newspaper to make them sparkle.
Step 11: Clean the Contents
If any of your food packages or appliances are dirty or dusty on the outside, give them a wipe-down before putting them back in your clean cabinet.
Step 12: Place the Contents Back into the Cabinet
Finally, place everything back where it was, or give it a fresh rearrange — your choice! Then, step back, and admire your hard work.
The Bottom Line
Learning how to clean kitchen cabinets properly is a great way to make your kitchen look fresh and new and prevent clutter from piling up. While a little time-consuming, it’s a simple process that’s easy to accomplish, and the end result will be worth it.
Remember to pay attention to the different finishes on your kitchen cabinets, and choose the right cleaning solution for the job. Also, be careful not to be too heavy-handed with your scrubbing, scraping, and cleaning, and work methodically.
Before you know it, you’ll have a spotless, sparkling kitchen that you can be proud of!
Common Questions about Cleaning Kitchen Cabinets
Yes! A mix of vinegar and warm water works wonders for everyday cleaning. Just avoid using it on natural stone countertops nearby, since vinegar can etch the surface.
A quick wipe with warm, soapy water and a microfiber cloth does the trick. Focus on high-touch spots like around the handles and edges for the biggest impact.
A light wipe-down once a week keeps them looking fresh. Do a deeper clean every couple of months to tackle grease, dust, and any hidden splatters.
It’s better to avoid furniture polish, since it can leave behind a residue that attracts dust. Instead, use a cabinet-safe cleaner that cleans and conditions in one go.
More Lifestyle Hacks
Whether you’re looking for more cleaning tips, organization tips, or easy ways to spruce up new spaces, we’ve got you covered with our lifestyle topics below!
- How to Organize Spices
- How to Make a Wood Accent Wall
- The Best Food Storage Containers
- Drawer Organizers
We would love to see pictures of your freshly cleaned cabinets! Please leave us a comment below, or tag us @fooddolls on Instagram!