
Transforming a dull room into a jaw-dropping interior design dream is easier than you think! Dive into the world of DIY with our guide on crafting a stunning wood accent wall. We’re spilling all our secrets, from budget-friendly tools to our top tricks, to ensure your journey to creating a captivating wood accent wall is smooth sailing.
*This post was inspired by Mai Happy Home
Our First Time DIY Accent Wall Project
Recently, we began to embark on our own DIY project throughout our homes to spruce things up without blowing our budget. We’re tackling everything from kitchen drawers to spice organization, racks, and more, and we thought we would take you along with us, starting with our DIY accent wall! Whether you’re completely new to home projects or a seasoned pro, you’re going to love this design, and you won’t believe how easy it is to recreate in your own home.
If you’re anything like us, you probably think that tackling home projects like this requires days and weeks of your time and costs and arm and a leg. However, that couldn’t be farther from the truth! In reality, this project took just a few hours out of our day and was way cheaper than hiring professionals to help. Even better, the results turned out great! Not only was it a fun bonding experience, but the results transformed our small space into a truly luxurious feeling room.
We’ll walk you through everything we did, the lessons we learned, and the tools we used along the way so you can skip the trial and error and create your own accent wall with ease!
How to Make a Wood Accent Wall
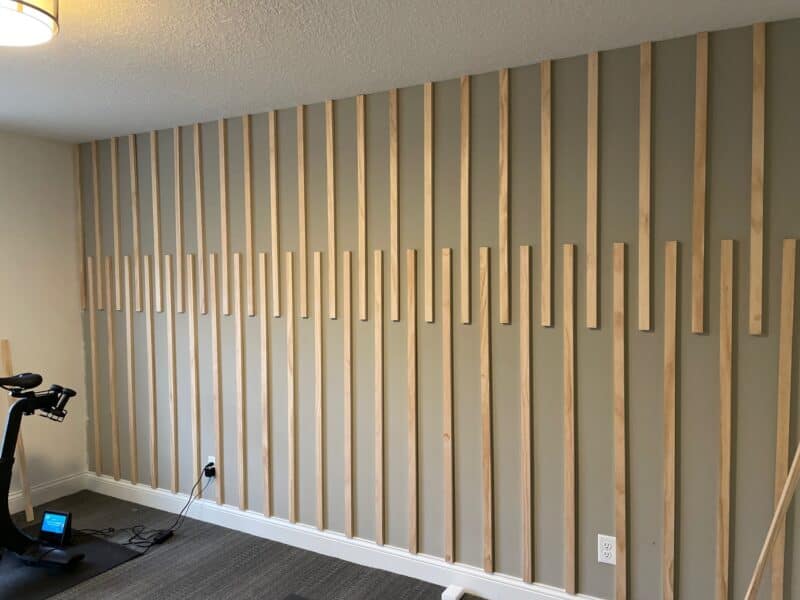
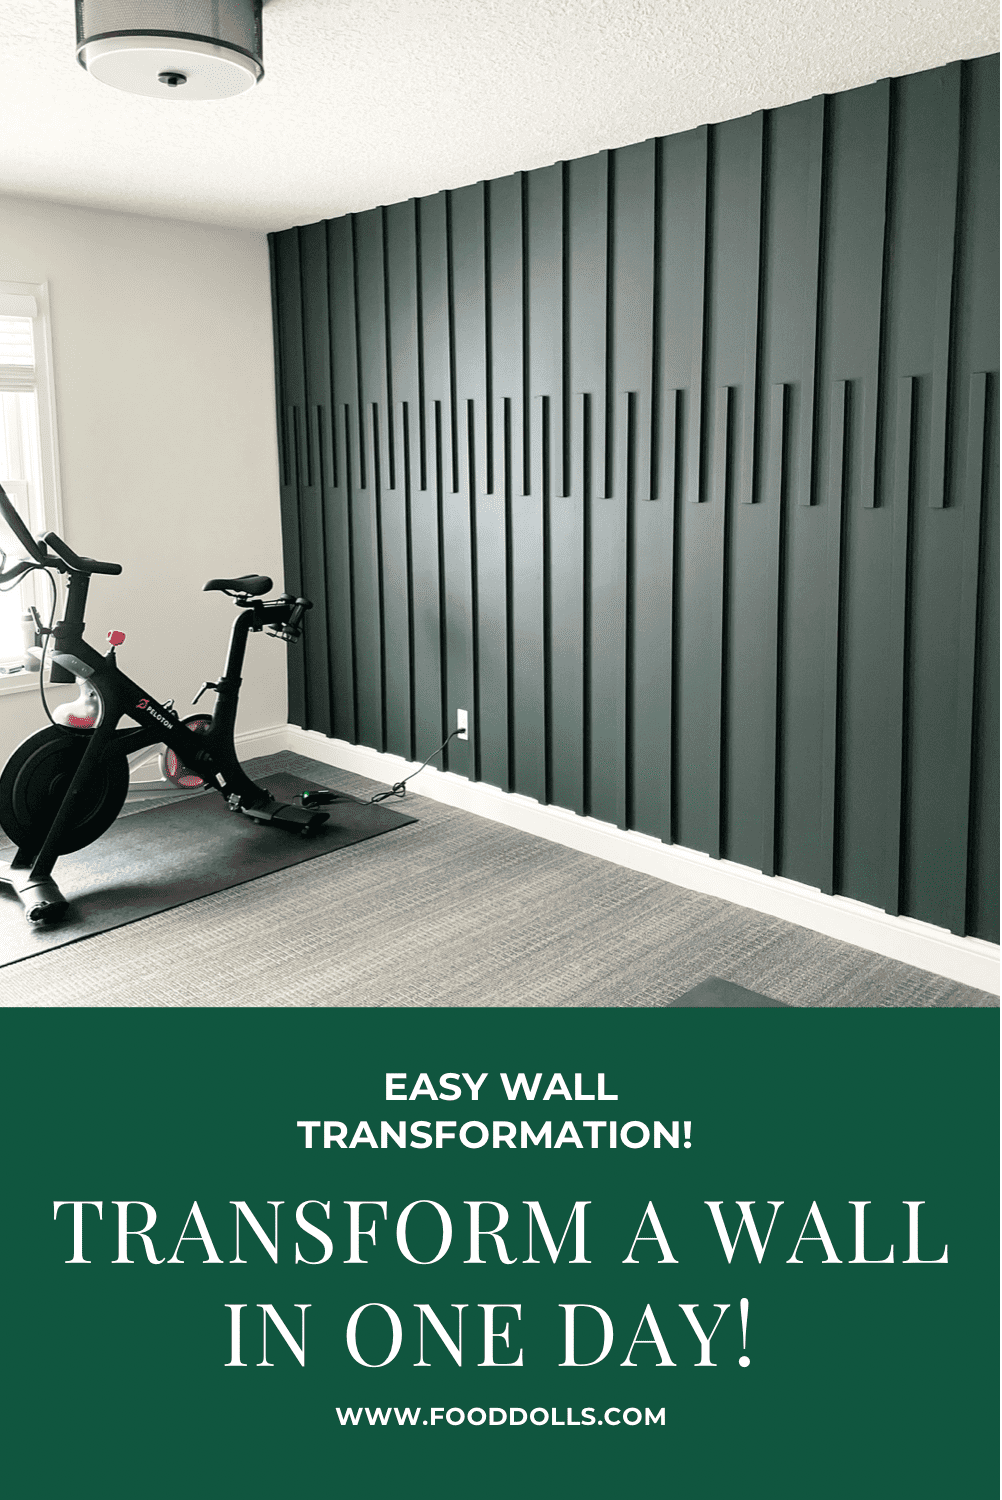
Given the amount of videos we make and all the time we spend on screen, it might come as a surprise to you to learn that we don’t actually have a designated filming studio. Instead, we use the room pictured below as both a filming studio and a workout room. To say it needed some love was an understatement. So, we decided to spruce it up! Keep reading to find the exact steps we took to transform the walls and wait till the end to see how much of a difference our efforts truly made.
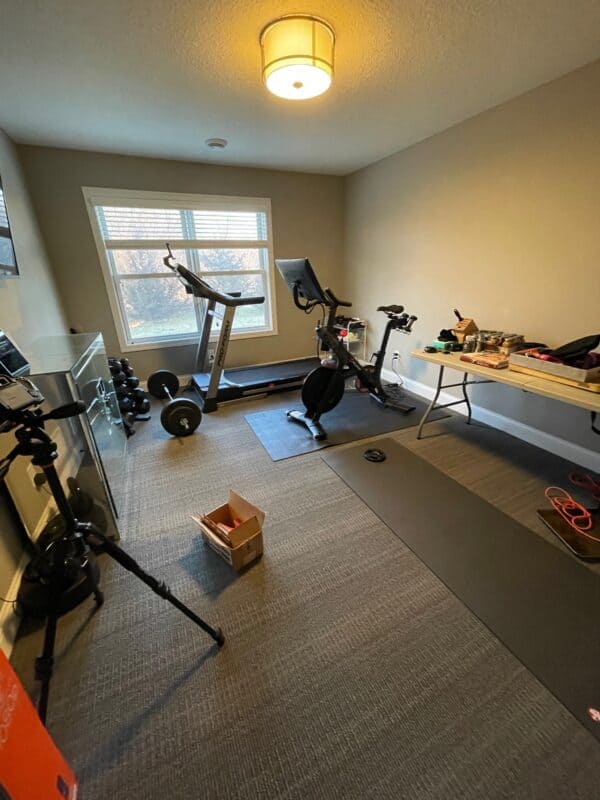
Step One: Choose Your Colors and Begin
To begin, we picked a single color to paint three adjacent walls. One key tip for this part of the process is to clear out the entire room you plan to paint. Trust us, it makes a world of difference and speeds up the painting! Once your working area has been completely cleared, paint three walls in the same color. We chose the same color used on the wood trim known as Dove White from Benjamin Moore. Personally, we love how clean and crisp it is without giving off a hospital or sterile feel thanks to the inclusion of its warm undertones.
Next, it’s time to move on to the accent wall. Given that this is the wall that will be decorated with wood, you’ll want to start by finding the center point of the wall. To do so, we began by measuring horizontally first and followed up with the vertical measurement. Once you’ve found the center of the wall, be sure to mark it with a pencil so you don’t lose sight of it.
Now, it’s time to determine the length of your wood! You’ll want to use two different lengths that are close to the length it would take to reach the center of the wall. For instance, we used pieces that were 45” long and 60” long.

Step Two: Collect Your Wood
Now that you’ve done the initial painting and all of the measuring, it’s time for the fun part! Grab your car keys, and head to Home Depot. We used 1×2 inch wood panels and grabbed 20 of them. Then, to keep things easy, we had the employees at the store cut the pieces to our desired lengths listed above — we highly recommend you do the same!
Step Three: Begin Securing the Wood
The next step is to start nailing the wood to your wall. We started at the bottom of our wall, but you could also start at the top. Either way, you’ll want to ensure that the center of the first piece of wood meets the center point of the wall that was marked in step one.
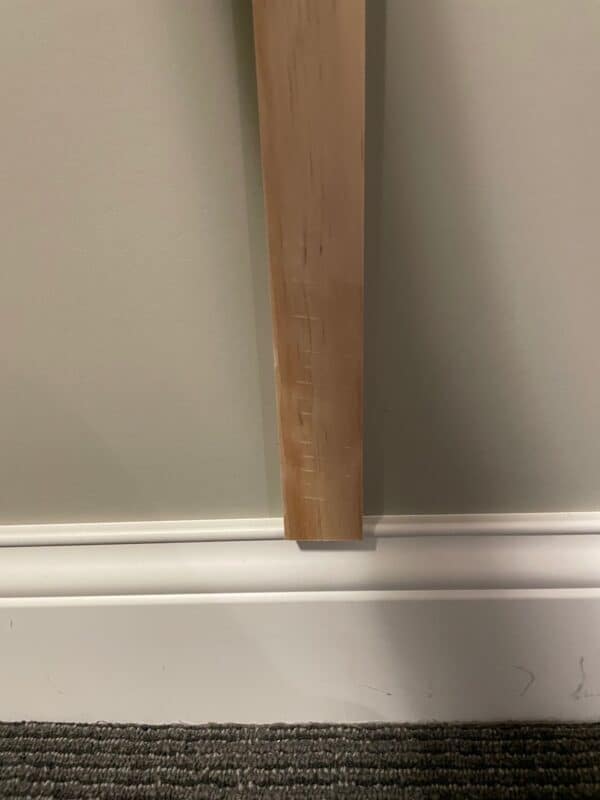
Pro-Tip: Feel free to remove the trim and run your wood pieces all the way to the floor! We chose to leave the trim intact, and ran the wood all the way to the end of it, sitting neatly on top. You could also miter the ends of the wood plans to allow them to sit flush with the trim.
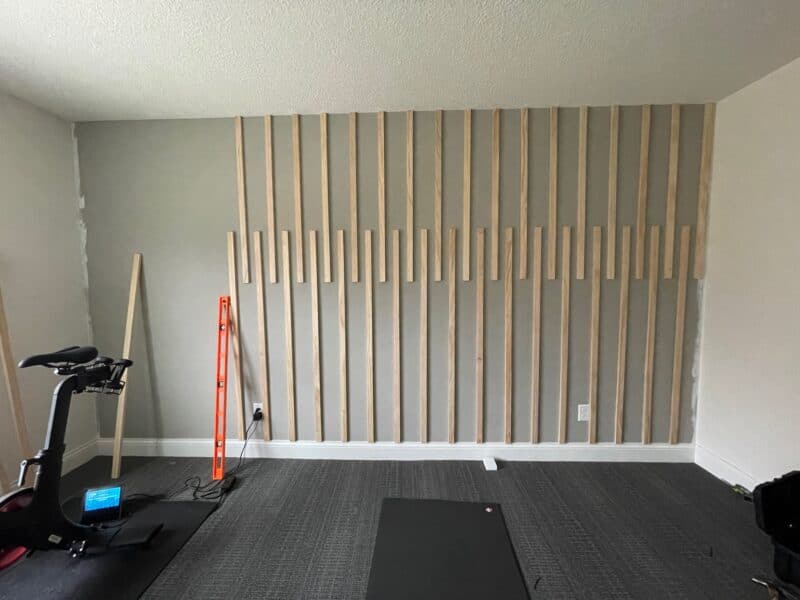
Use a Brad nail gun to secure the first piece of wood to the wall, making sure it is level as it is being nailed. You HAVE to do this for every. Single. Piece. You’ll also want to make sure the wood is as straight and as flat as possible before nailing it down. Warping or bending of any sort will make it difficult to attach to the wall and a nightmare to paint. To make spacing easier, we used the leveling tool to measure the distance between wood planks.
Once you’ve got the hang of measuring and nailing, go on autopilot, and get the job done! Not only is it fun, but it’s also quick. From start to finish, it only took us an hour to do the whole wall.
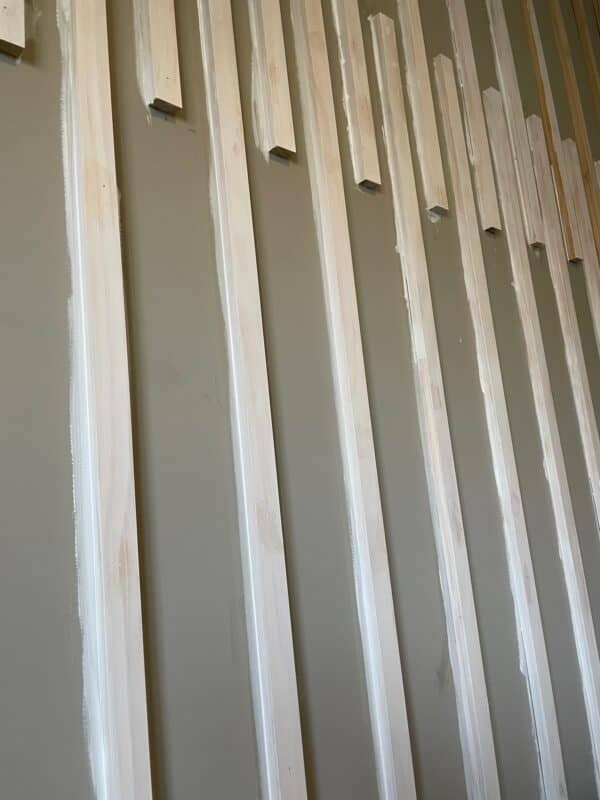
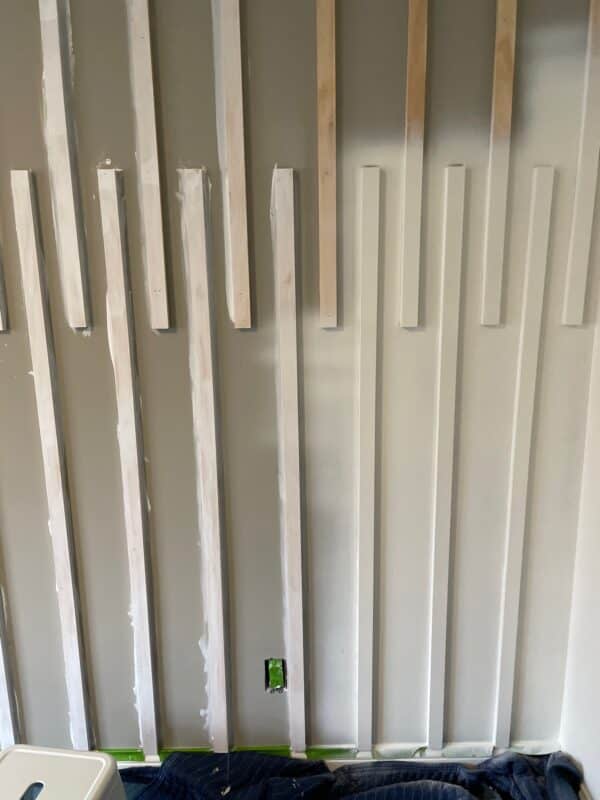
Step Four: Caulk and Fill in Holes
Now that the wood is in place, go back and caulk the walls and fill in any holes that may already have existed or were formed in the process. Before we began we decided to also prime the wood but found that doing so was not necessary — we highly recommend skipping that step as the paint should have no trouble sticking to the wood.
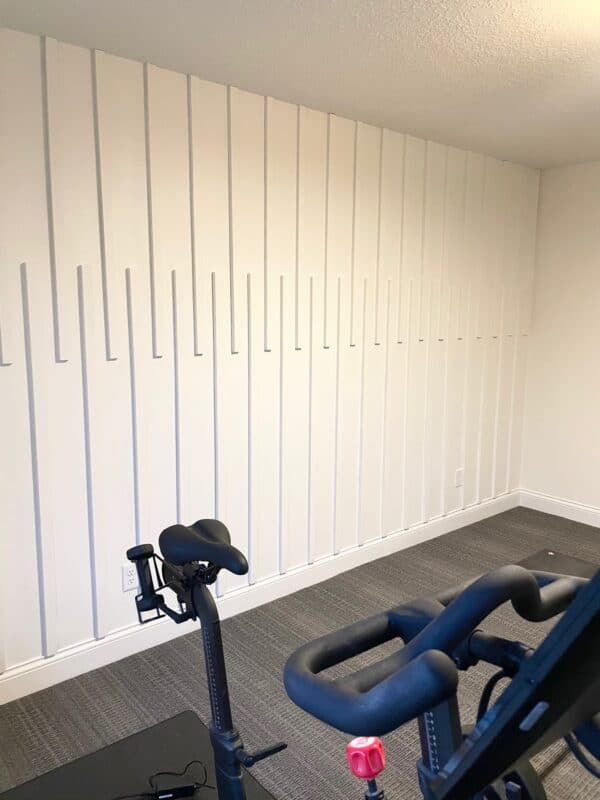
Step Five: Paint!
To finish, paint the wood and wall with a brush or spray paint. However, if you plan to paint by hand, we recommend doing the walls first. This will make it much easier to coat the wood in the end! We chose to spray paint both the walls and the wood, and it turned out great.
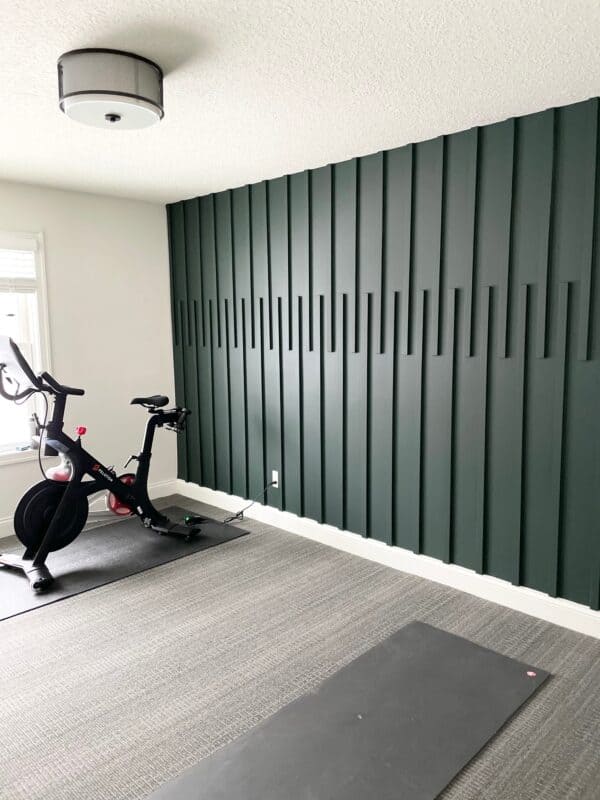
The first round of paint we used was the same color as the other three walls. It looked AMAZING in the same tone. However, after the spraying was complete, we felt it didn’t quite live up to the dramatic look we were looking to achieve. So, we took the plunge and went for a bolder color and bigger impact using Essex Green paint from Benjamin Moore instead. Luckily, painting doesn’t take long, and the final look was just what we wanted! Dramatic, trendy, and timeless, it was perfect, and we couldn’t be more pleased!
What We Learned
All in all, we had a lot of fun with this project and will definitely be pursuing more DIY tasks in the future! To recap the steps:
- Paint 3 walls in a single, neutral color.
- Measure the center point of the fourth wall.
- Nail two different sized wood planks at the top and bottom of the wall.
- Paint the wall and wood in a second, bolder color.
Through the process, we gathered a few tips and tricks to make your accent wall project even easier.
- Have Home Depot (or wherever you get your wood) cut the lengths for you.
- Measure and level every single piece of wood to make sure they’re even and straight.
- Skip priming the wood as it’s not necessary and creates more work.
- Have fun, and don’t be afraid to take risks!
Tools We Used
Given how beautiful these walls turned out, you might be surprised to learn that just a few tools are needed. Here’s what we used:
- Nail Gun
- Caulking
- Wood Filler
- Best Paint Brush
Common Questions about Making a Wood Accent Wall
Is a wood accent wall still in style?
Absolutely! Wood accent walls bring warmth, texture, and a natural element that never really goes out of fashion. They can look rustic, modern, or even sleek, depending on the type of wood and finish you choose, which makes them super versatile for any room.
What room should I put a wood accent wall in?
The beauty of an accent wall is that it can shine almost anywhere. Living rooms, bedrooms, and dining areas are popular picks, but you can also make a big statement in a hallway, office, or even behind open shelving in a kitchen.
Does an accent wall make a room look bigger or smaller?
It depends on how you use it! A dark wood wall can cozy up a space and make it feel more intimate, while a lighter-toned or horizontally installed wood wall can create the illusion of a wider, more open area.
Do accent walls add value to a home?
They can! A well-designed wood accent wall adds character and a custom look that potential buyers often love. It gives your home that extra “wow” factor that makes it stand out in a crowded market.
We hope you enjoyed watching this project unfold! Let us know any DIY or organization projects you’d like to see next. Also, don’t forget to tell us which version of our walls you liked best. Would you have kept the accent wall white? Do you love the green? Comment below, and let us know!
If you attempt your own accent wall or home project, we would love to see it. Tag us on Instagram (@fooddolls), and let us know how it goes.


how long were the pieces of wood prior to cutting?
Hi Renee,
While that’s a good question, we don’t recall how long they were before they were cut. We asked the Home Depot staff to cut them into the 45″ and 60″ pieces. Hope you enjoy making an accent wall! If you do, be sure to share it here!
xo,
Alia & Radwa
How far apart did you place each wood slat?
How far apart did you place each wood slat?
2 1/2 inches!
Xo,
Alia & Radwa
How much space did you have between your boards? This looks amazing! I am totally doing this in our main bedroom as a statement wall!
It was just a couple inches in the center part. Let us know how your wall turned out!
xo,
Alia and Radwa
What is the spacing between panels?
It’s a couple of inches in between them where they meet in the center! Let us know if you make your own accent wall!
xo,
Alia and Radwa
how much did you spent on this project?
Love the green! I wonder if you could use liquid nails instead of the brad nailer? 🤔
Thank you! We’re not sure but would love to know how it goes if you try it out!
Xo,
Alia & Radwa
Hello! How far apart are the pieces of wood?
The look is absolutely gorgeous!!
They are a couple of inches apart! Thanks so much for the amazing feedback!
xo,
Alia and Radwa
Love the accent wall! You two have inspired me!! What paint finish did you use for the white and the green?? Maybe semi gloss for the green? Thank you !
Semi gloss would look beautiful! 🙂 Thank you for your amazing feedback!
xo,
Alia and Radwa
I Love The Green!